Friday, September 14, 2012

Homemade Oreos

One of the most welcome parts about living on the east coast again is being able to join in for all of the family gatherings that occur throughout the year. Rather than getting my yearly fix of family at the holidays, I get to celebrate promotions, birthdays, holidays, Fridays, and any other “days” that merit a meal with the people who share your DNA. 

While the idea would be that these festivities are distributed throughout the year, the Berlin clan ups the ante. Of our immediate family, three out of four have birthdays within 4 weeks of each other. Now I’m not saying which member has a totally unique, special, and original birthday outside of those four weeks, but I will give you the hint that I happen to be in charge of multiple baking projects in September/October! 

Figure it out? I knew you were smart. 

Birthday #1: the papa’s. This is a man who raised me with the mantra, “Oreos are a food group.” Naturally, a homemade version was in order. 

In good faith, I can’t tell you that these tasted EXACTLY like the real thing. The wafers are a different texture, and the filling is a little heavy on the vanilla. However, that does not take away from the fact that I would eat these cookies every day and twice on Sunday. 

Next up: celebrating the end of sister’s years in her 20s. Baking ideas? 


Homemade Oreos
Recipe adapted from Smitten Kitchen

Ingredients for the chocolate wafers:
1 1/4 cups all-purpose flour
1/2 cup unsweetened cocoa
1 teaspoon baking soda
1/4 teaspoon baking powder
1/4 teaspoon salt
1 cup sugar
1/2 cup plus 2 tablespoons room-temperature, unsalted butter
1 large egg

Ingredients for the filling:
1/4 cup room-temperature, unsalted butter
1/4 cup vegetable shortening
2 cups confectioners’ sugar
2 teaspoons vanilla extract

Directions:
1. Set two racks in the middle of the oven. Preheat to 375°F.
2. In a food processor, or bowl of an electric mixer, thoroughly mix the flour, cocoa, baking soda and powder, salt, and sugar. While pulsing, or on low speed, add the butter, and then the egg. Continue processing or mixing until dough comes together in a mass.
3. Take rounded teaspoons of batter and place on a parchment paper-lined baking sheet approximately two inches apart. With moistened hands, slightly flatten the dough. Bake for 9 minutes, rotating once for even baking. Set baking sheets on a rack to cool.
4. To make the cream, place butter and shortening in a mixing bowl, and at low speed, gradually beat in the sugar and vanilla. Turn the mixer on high and beat for 2 to 3 minutes until filling is light and fluffy.
5. To assemble the cookies, spread or pipe frosting onto the center of one cookie. Lightly press onto another cookie, to work the filling evenly to the outsides of the cookie. Continue this process until all the cookies have been sandwiched with cream. Makes about 20 sandwiches. 


Note: These do not lend themselves to birthday candles. We had to do a last-minute quick fix: birthday cantaloupe with a side of homemade oreos :)

Roasted Mustard Potato Salad

Every once in a while, a recipe just lands in your lap with such perfect timing that you’d be a fool not to give it a try.

Picture this: it’s the day after a long weekend filled with celebrations and indulgence. You go to the grocery store to pick up a few odds and ends, but inspiration is really lacking for how to make these items into a cohesive meal. You proceed to the checkout repeating your mantra, “I’ll just throw a few of these things together and figure something out.”

No sooner do you walk into your apartment, grocery bags in tow, when your phone gives its friendly “ding” alerting you of a new email. Procrastinating unpacking, and even more, delaying the moment where you actually have to make good on your promise to figure something out, you give in to the phone’s alert and check your email.

Lo and behold, it’s a recipe that someone thought you might enjoy. Even better, it’s a recipe for which you just bought the main ingredient at the grocery store.

Serendipitous, isn’t it?

To call this a potato salad might be misleading. I’d consider it more of a fancied-up version of your mom’s potatoes. It’s warm, spiced, and keeps you coming back for more. Thanks for the tip, Barb!


Roasted Mustard Potato Salad
Adapted from All Recipes

Ingredients:
6 Yukon Gold potatoes, cubed
1/4 cup canola oil (or less)
3 tablespoons distilled white vinegar
1 tablespoon Dijon mustard
1/2 teaspoon celery salt
1/4 teaspoon pepper

Directions:
1. Preheat oven to 450F.
2. Bring a large pot of salted water to a boil, and cook potatoes 10 to 15 minutes, until tender but firm. Drain, and transfer to a medium bowl.
3. In a small bowl, mix canola oil, vinegar, Dijon mustard, celery salt, and pepper. Toss 1/2 the mixture with the potatoes.
4. Arrange potatoes in a single layer on a sheet of foil, and place flat on a roasting pan. Turning occasionally, roast 10-12 minutes, or until lightly browned. Remove from heat, and cool. Toss with remaining oil mixture to serve.

Monday, September 3, 2012

Banana (Choco-Bourbon) Nut Bread

A week away from home is not a terribly lengthy time. But it's long enough to make you miss certain things. Like a bed that smells like fresh detergent or pillows that put your head in that perfect little cradle. Not to mention the familiar hum of your home's individual noises, or a closet that has all of the shoes/dresses/skirts/earrings/anything you could want all in one place. And it's not so bad to come home to your S.O., especially after a week of small talk and chatting up strangers.

For a work trip, the week was actually quite nice! I got to spend some quality time in Baltimore, catching up with old friends included. And then I hopped on over to Minnesota for the ever-exciting Minnesota State Fair, don't you know! Fried food on a stick and good midwestern hospitality made the trip a true pleasure. 

Beautiful view for a lunchtime run
By the time I got back, I was itching to get my hands dirty in the kitchen. I've also been accused by a nameless someone that I only bake for other people, rather than baking for fun to keep around the house. I'm pretty sure my waistline is the reason for that, but nonetheless, I can't be developing any kind of reputation as a stingy baker! With a handful of overripe bananas staring me in the face, banana bread was the clear frontrunner. I decided to make this bread really decadent and throw in the leftover chocolate chips that were sitting in the pantry, as well as a dash of bourbon to make the bread feel a little rebellious. One slice is already gone...now let's see how long the rest of the bread sticks around!


Banana (Choco-Bourbon) Nut Bread

Ingredients:
3 ripe bananas, smashed
1/3 cup melted butter
3/4 to 1 cup brown sugar
1 egg, beaten
1 teaspoon vanilla
1 tablespoon bourbon
1 teaspoon cinnamon
1/2 teaspoon nutmeg
1/4 teaspoon allspice
Pinch of ground cloves
1 teaspoon baking soda
Pinch of salt
1 1/2 cup of flour
1/2 cup walnuts, chopped and toasted
1 cup chocolate chips

Directions:
Preheat the oven to 350°F. Toast the walnuts and set aside. With a wooden spoon, mix butter into the mashed bananas in a large mixing bowl. Mix in the sugar, egg, vanilla and bourbon, then the spices. Sprinkle the baking soda and salt over the mixture and mix in. Add the flour and mix. Lastly, add the nuts and chocolate chips. Pour mixture into a buttered 4×8 inch loaf pan. Bake for 50 minutes, or until a tester comes out clean. Cool on a rack. Remove from pan and slice to serve.

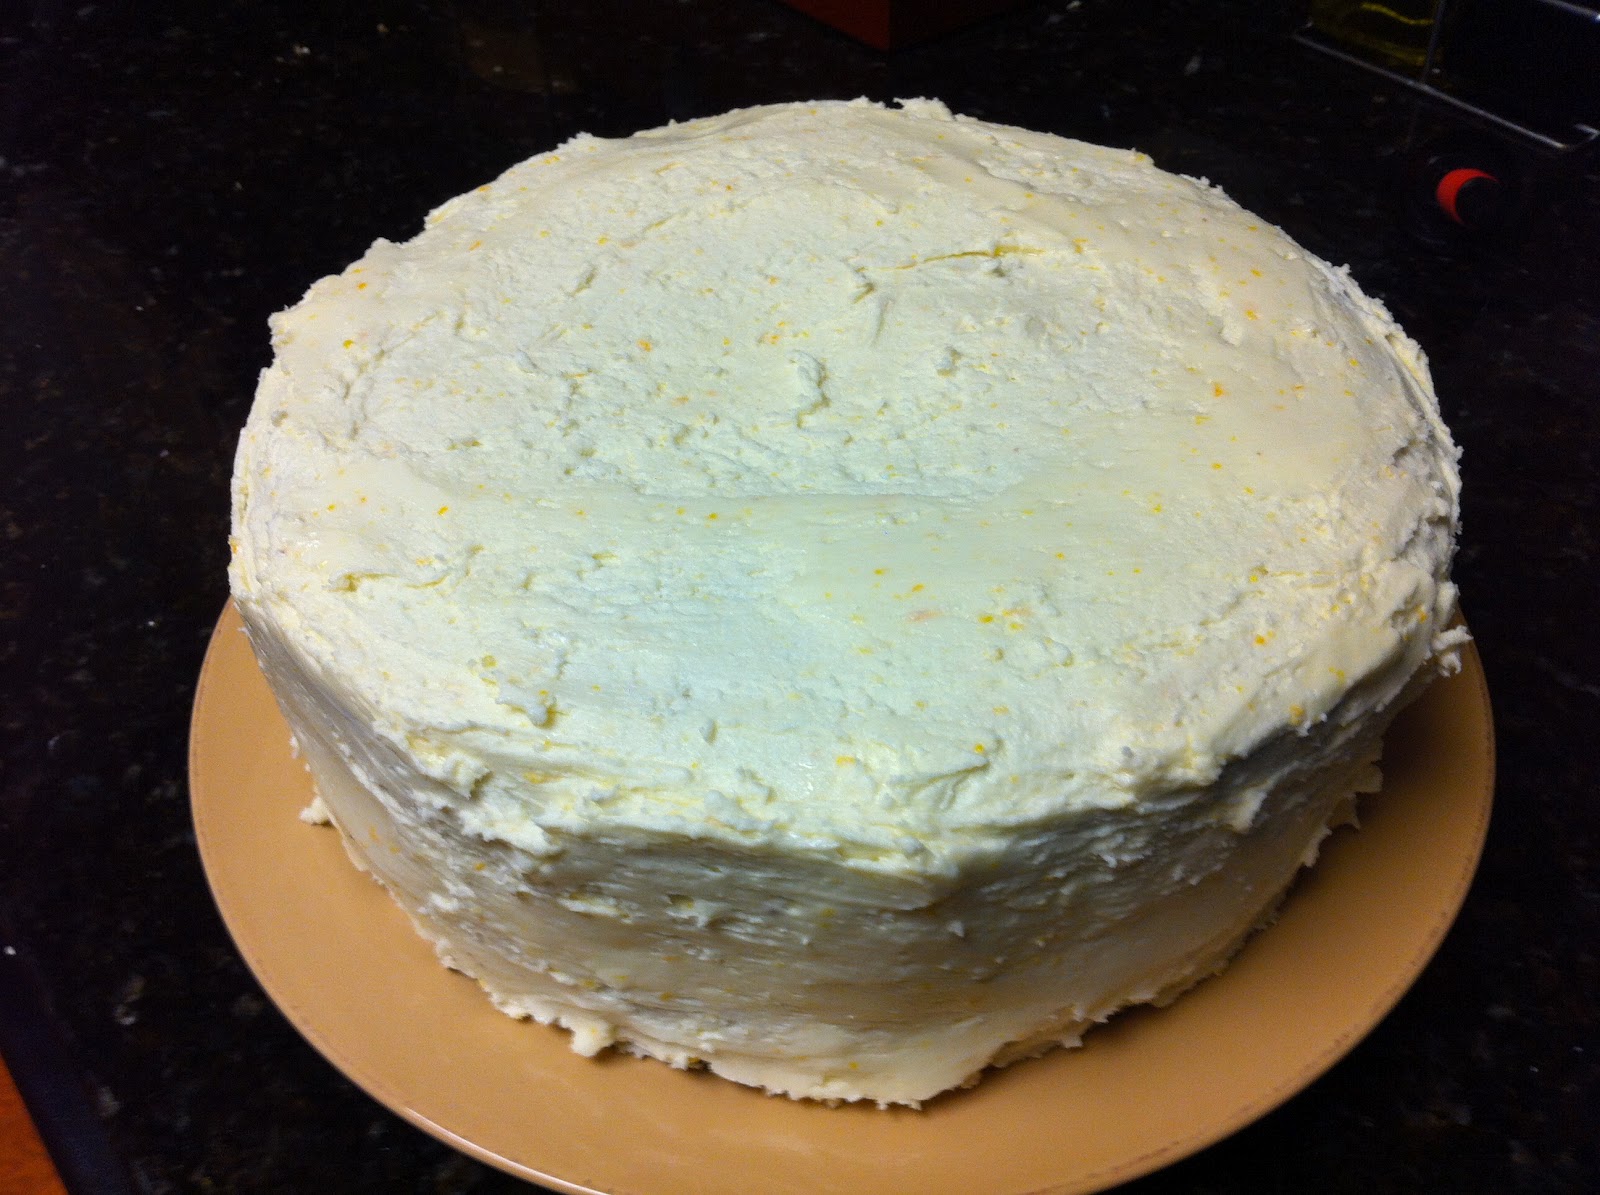
Williamsburg Orange Cake & cake icing tip

One of my favorite things about summertime is the flurry of celebrations that spring up as people take advantage of the of the warm glow of long summer days. Put a glass of wine in my hand, stand me on a porch surrounded with fun company, and I feel like I've landed in heaven every single time. 

MM and I have had the fortune to spend not one, not two, but three weekends in a row partaking in these summer celebrations, and there's still a few more to come this month! Big congratulations are in order for Lindsey & Jason, Brendan & Jamie, and Mr. G for their two weddings and a birthday (sounds like a movie title, doesn't it?).

Unlike the catered weddings, the birthday party had openings for food contributions, and I was all too happy to jump in the kitchen and get to baking. Little did I know, I was going to be in charge of making the birthday boy's cherished favorite cake. No pressure, right? 

Fortunately, all went according to plan. And when the birthday boy tasted the cake, I received the coveted verdict: "Welcome to the family!"

In addition to the recipe below, here's a tip for icing the cake that my clever mother shared with me, and it only seems right to share with the baking world. Rather than worrying about moving the cake once it's iced or having to wipe down the plate without disturbing the cake, there's a simple way to keep your serving plate frosting-free as you ice the cake. Simply tear small pieces of tin foil or parchment paper and place them around the rim of the plate so that the edge of the plate is covered all around. Then, set the cake layer on top of the small pieces. Ice the cake as you would normally, and then all you have to do is remove the small pieces of foil at the base, and you're left with a clean serving plate and a fully iced cake.


Williamsburg Orange Cake Recipe from Betty Crocker's Cookbook (1969)

Ingredients:
2-1/2 cups flour
1-1/2 cups sugar
1-1/2 t. soda
3/4 t. salt
1-1/2 cups buttermilk
1/2 cup margarine, softened
1/4 cup shortening
3 eggs
1-1/2 t. vanilla
1 cup golden raisins, cut up
1/2 cup finely chopped nuts
1 T. grated orange peel

Directions:
Heat oven to 350 degrees.
Grease and flour 13" x 9" x 2" baking pan, or two 9-inch round layer pans, or three 8-inch round layer pans.
Measure all ingredients into large mixer bowl. Blend 1/2 minute on low speed, scraping bowl constantly. Beat 3 minutes on high speed, scraping bowl occasionally. Pour batter into pans.
Bake 13" x 9" x 2" pan 45 - 50 minutes, or until a wooden pick inserted in the center comes out clean. Bake layers 30 - 35 minutes. Cool. Frost with Williamsburg Butter Frosting.

Williamsburg Butter FrostingRecipe from Betty Crocker's Cookbook (1969)

Ingredients:
1/2 cup soft butter or margarine
4-1/2 cups powdered sugar
4 - 5 T. orange-flavored liqueur or orange juice
1 T. grated orange peel

Blend butter and sugar. Stir in liqueur and orange peel. Beat until smooth.

Monday, August 13, 2012

Crook's Corner Shrimp and Grits

What a fun weekend! My Friday night consisted of a ride-along with a local cop who specializes in DUI enforcement for a work project - to say it was eye-opening is doing it a disservice! Drivers beware: this man is not messing around!

Saturday, it was off to Baltimore for an Oriole's game. You never realize how much you love a stadium and the person keeping you company until you're in the middle of a 3.5 hour rain delay on a warm August night. A few beers and a lot of people watching later, the game finally started! Despite the mark in the "L" column, it was an extremely fun night.


The Inner Harbor makes for a pretty view for the morning run!
So let's talk about this recipe. There's a restaurant in Chapel Hill, NC called Crook's Corner, known throughout the whole region for their famous shrimp and grits. I finally got my hands on the recipe a few months ago, but I've been putting off making the recipe out of the slight fear that it would be impossible for a homemade version to live up Crook's Corner's finest. Optimism in tow, fellow former Chapel Hillian and BFF Jennie came and joined me for our testing experiment. 


Wine + Shrimp = Happy Chef Jennie
Um. WOW. Only complaint, why didn't it make more? MM's reaction: "That isn't shrimp and grits, that's an experience."


Crook's Corner Shrimp and Grits
Recipe from My Recipes

Ingredients:
2 cups water
1 (14-ounce) can chicken broth
3/4 cup half-and-half
3/4 teaspoon salt
1 cup regular grits
3/4 cup shredded Cheddar cheese
1/4 cup grated Parmesan cheese
2 tablespoons butter
1/2 teaspoon hot sauce
1/4 teaspoon white pepper (I used black and can't say that I noticed anything amiss)
3 bacon slices
1 pound medium-size shrimp, peeled and deveined
1/4 teaspoon black pepper
1/8 teaspoon salt
1/4 cup all-purpose flour
1 cup sliced mushrooms
1/2 cup chopped green onions
2 garlic cloves, minced
1/2 cup low-sodium, fat-free chicken broth
2 tablespoons fresh lemon juice
1/4 teaspoon hot sauce
Lemon wedges

Directions:
1. Bring first 4 ingredients to a boil in a medium saucepan; gradually whisk in grits. Reduce heat, and simmer, stirring occasionally, 10 minutes or until thickened. Add Cheddar cheese and next 4 ingredients. Keep warm.
2. Cook bacon in a large skillet until crisp; remove bacon, and drain on paper towels, reserving 1 tablespoon drippings in skillet. Crumble bacon, and set aside.
3. Sprinkle shrimp with pepper and salt; dredge in flour.
4. Sauté mushrooms in hot drippings in skillet 5 minutes or until tender. Add green onions, and sauté 2 minutes. Add shrimp and garlic, and sauté 2 minutes or until shrimp are lightly brown. Stir in chicken broth, lemon juice, and hot sauce, and cook 2 more minutes, stirring to loosen particles from bottom of skillet.
5. Serve shrimp mixture over hot cheese grits. Top with crumbled bacon; serve with lemon wedges.

Glazed Cinnamon Swirl Almond Cookies

Remember when I told you that you could repurpose the leftover tart dough from the summer berry tart recipe? Well here you go - a recipe that will take you 5 minutes to put together but will give the wow-factor of a way more labor-intensive project. I had originally envisioned these puffing up like cinnamon rolls, but it turns out that they prefer to be cookies, and I am not complaining. MM requested that these cookies become a regular part of the rotation!

Pre-Baking...we gobbled them up once they were cooked!

Glazed Cinnamon Swirl Almond Cookies

Cookies
Ingredients:
Leftover almond tart dough
2 tbsp butter, room temperature
Cinnamon to taste
2 tbsp sugar (adapt to your taste)

Directions:
1. Preheat oven to 375F.
2. Roll out leftover dough until it's approximtely 1/4" thick.
3. Spread butter over flattened dough, and sprinkle with cinnamon and sugar.
4. Roll up the dough tightly, pinching the ends to keep the cinnamon and sugar inside the roll.
5. Slice the dough in 1/4"-1/2" slices, and lay flat on a foil-lined baking sheet.
6. Bake for 20 minutes, or until cookies are golden and no longer soft.

Glaze
Whisk together 1.5 cup of powdered sugar with 2 tbsp of milk. Drizzle over cookies while cookies are still warm.

Thursday, August 9, 2012

Summer Berry Tart


It’s been a difficult week here at the casa. What started out with a lot of excitement ended in a stark reality check. MM and I had been on the search for a great dog, and we found one who melted our hearts. A meet-and-greet and a homevisit later, Archie came to stay.

Sadly, Archie isn’t quite cut out for apartment living, and we quickly came to the realization that our trio wasn’t the right fit. So today, we are saying goodbye to Archie. I hope you get a life full of ear scratches, big fields, and people to lovingly keep you company, little buddy. We’ll miss you.

On a lighter note, let’s get back to cooking. This tart is delicious. Did I say delicious? I think I meant to say “fight over the last piece you're the last man standing” scrumptious. You can use any type of seasonal berries, but make sure you note how long the dough must chill in the refrigerator before cooking. I forgot to do that, and had to delay my baking for a bit as a result.

Bonus: the tart dough recipe makes enough for three crusts. You can certainly cut the recipe in half to minimize leftovers. Orrrr you can do yourself a favor and make that extra dough. I’ll be posting a recipe this weekend for an easy way to use the leftovers for breakfast and become the most popular person in your household.

Summer Berry Tart
Adapted from Smitten Kitchen

Tart Dough (makes enough for three 9-inch tart crusts)

Ingredients:
2 ½ unsalted butter, at room temperature
1 ½ cups confectioners’ sugar, sifted
Lightly packed ½ cup ground blanched almonds
½ teaspoon salt
½ teaspoon pure vanilla extract
2 large eggs, at room temperature
3 ½ cups all-purpose flour

Directions:
1.      Place the butter in the work bowl of a food processor fitted with the metal blade and process, scraping down the sides of the bowl as needed, until creamy. Add the confectioners’ sugar and process to blend well. Add the ground almonds, salt, and vanilla and continue to process until smooth, scraping the bowl as necessary. Lightly stir the eggs together with a fork and, with the machine running, add them to the work bowl; process for a few seconds to blend. Finally, add the flour and pulse until the mixture just starts to come together. When the dough forms moist curds and clubs and then starts to form a ball, stop! — you don’t want to overwork it. The dough will be very soft, and that’s just as it should be.

2.      Gather the dough into a ball and divide it into 3 pieces. Gently press each piece into a disk and wrap each disk in plastic. Allow the dough to rest in the refrigerator for at least 4 hours, or for up to 2 days, before rolling and baking. (The dough can be wrapped airtight and frozen for up to a month.)

3.      To roll and bake tart crusts: For each tart, butter the right-sized tart pan and place it on a parchment-lined baking sheet. If you are making more than one tart, work with one piece of dough at a time.

4.      Depending on how thin you’d like your dough, you can either roll out your dough or press it using your fingers. The easiest way to roll out your dough is to place the disk between two pieces of parchment paper, and then use a rolling pin to flatten the dough. If you use your fingers, gently begin pressing the center of the dough outwards towards the edge of the pan. As this warms the dough a bit, put the dough back in the refrigerator for a few minutes before baking.

5.      When you are ready to bake the crust(s), preheat the oven to 350°F. To avoid bubbles in the crust, line each crust with a circle of parchment paper or foil and fill with dried beans or rice.

6.      Bake the crust (or crusts) for 20 to 25 minutes, or just until very lightly colored. If the crust needs to be fully baked, remove the parchment and beans and bake the crust for another 3 to 5 minutes, or until golden. Transfer to a rack to cool.

Pastry Cream

Ingredients:
1 1/4 cups whole milk
1 teaspoon vanilla extract
3 large egg yolks
1/2 cup sugar
3 tablespoons cornstarch
3 tablespoons unsalted butter, at room temperature

Directions:
1.      Bring the milk to a boil in a small saucepan over medium heat. Cover the pan, turn off the heat, and set aside for 10 minutes.

2.      Working in a heavy-bottomed medium saucepan, whisk the yolks, sugar, and cornstarch together until thick and pale. Whisking all the while, very slowly drizzle a quarter of the hot milk onto the yolks. Then, still whisking, pour the rest of the liquid in a steady stream over the tempered yolks.

3.      Put the pan over medium heat and, whisking vigorously and without stop, bring the mixture to the boil. Keep the mixture at the boil, whisking energetically, for 1 to 2 minutes until cream has formed, then remove the pan from the heat and scrape the pastry cream into a clean bowl. Allow the pastry cream to cool on the counter for about 3 minutes.

4.      Cut the butter into chunks and stir the chunks into the hot pastry cream along with the vanilla extract, continuing to stir until the butter is melted and incorporated. At this point, the cream needs to be thoroughly chilled. You can either set the bowl into a larger bowl filled with ice cubes and cold water and, to ensure even cooling, stir the cream from time to time, or refrigerate the cream, in which case you should press a piece of plastic wrap against the surface to create an airtight seal.

Finishing the tart
Shortly before you are ready to serve the tart, spread the pastry cream in the bottom of the baked tart shell and arrange the berries over the top. I used strawberries and blueberries, but feel free to experiment with any berry that’s in season!