Showing posts with label dessert. Show all posts

Monday, March 26, 2012

Irish Car Bomb Cupcakes

Once upon a time, there was a cupcake. Now, this was no ordinary cupcake, mind you. This cupcake was rich. This cupcake was chocolatey. This cupcake oozed goodness from every pore of its being.

What sets this cupcake apart from its other frosted friends? Two words: booze and ganache.

I'm still sighing just thinking about them. Of course, you'll notice there are very few pictures. There's a simple reason for that. A simple, full-tummied, chocolate-smeared-face reason for that. Whoops.

So here's how this cupcake works:
1. You open a Guinness. You pour a little bit of that Guinness into your cupcake batter. You drink the rest. You're already happier, right?
2. You cut out little holes in the middle of the cupcakes. Now you have a pile of cupcake bits that surely cannot go to waste. Taste them, you will. Better than medication, I'm telling you.
3. You fill those cupcake wells up with a chocolate ganache that's been infused with Irish whiskey. You also pour yourself a little Jameson on the rocks. Yep, you're already in heaven. And you're not even done!
4. You whip up a buttercream frosting that skips the milk and instead uses Baileys Irish Cream to give the frosting its smooth, boozy goodness. (I think it goes without saying that here is when you also make yourself an Irish coffee to satisfy your already smiling palette). 
5. Bite into the ooziest, booziest cupcake and thank the Irish people for giving us the opportunity for this treat.

*Kevin and Guida, thanks for having us over and for my first cabbage and corned beef experience. Yum!


Photo by: Smitten Kitchen

Irish Car Bomb Cupcakes
Recipe from Smitten Kitchen 
 Makes 20 to 24 cupcakes

Guinness Chocolate Cupcakes 1 cup stout (such as Guinness)
1 cup (2 sticks) unsalted butter
3/4 cup unsweetened cocoa powder (preferably Dutch-process)
2 cups all purpose flour
2 cups sugar
1 1/2 teaspoons baking soda
3/4 teaspoon salt
2 large eggs
2/3 cup sour cream

Ganache Filling
8 ounces bittersweet chocolate
2/3 cup heavy cream
2 tablespoons butter, room temperature
1 to 2 teaspoons Irish whiskey (optional)

Baileys Frosting (I recommend doubling this recipe unless your frosting habits are VERY sparse)
3 to 4 cups confections sugar
1 stick (1/2 cup or 4 ounces) unsalted butter, at room temperature
3 to 4 tablespoons Baileys (or milk, or heavy cream, or a combination thereof)


Directions:
Make the cupcakes: Preheat oven to 350°F. Line 24 cupcake cups with liners. Bring 1 cup stout and 1 cup butter to simmer in heavy large saucepan over medium heat. Add cocoa powder and whisk until mixture is smooth. Cool slightly.

Whisk flour, sugar, baking soda, and 3/4 teaspoon salt in large bowl to blend. Using electric mixer, beat eggs and sour cream in another large bowl to blend. Add stout-chocolate mixture to egg mixture and beat just to combine. Add flour mixture and beat briefly on slow speed. Using rubber spatula, fold batter until completely combined. Divide batter among cupcake liners, filling them 2/3 to 3/4 of the way. Bake cake until tester inserted into center comes out clean, rotating them once front to back if your oven bakes unevenly, about 17 minutes. Cool cupcakes on a rack completely.

Make the ganache filling: Chop the chocolate and transfer it to a heatproof bowl. Heat the cream until simmering and pour it over the chocolate. Let it sit for one minute and then stir until smooth. (If this has not sufficiently melted the chocolate, you can return it to a double-boiler to gently melt what remains. 20 seconds in the microwave, watching carefully, will also work.) Add the butter and whiskey (if you’re using it) and stir until combined.

Fill the cupcakes: Let the ganache cool until thick but still soft enough to be piped (the fridge will speed this along but you must stir it every 10 minutes). Meanwhile, using a knife or an apple corer, cut the centers out of the cooled cupcakes. You want to go most of the way down the cupcake but not cut through the bottom — aim for 2/3 of the way. A slim spoon or grapefruit knife will help you get the center out. Those are your “tasters”. Put the ganache into a piping bag with a wide tip and fill the holes in each cupcake to the top. A ziploc bag will work just as well as a fancy piping bag.

Make the frosting: Whip the butter in the bowl of an electric mixer, or with a hand mixer, for several minutes. You want to get it very light and fluffy. Slowly add the powdered sugar, a few tablespoons at a time.

When the frosting looks thick enough to spread, drizzle in the Baileys (or milk) and whip it until combined. If this has made the frosting too thin (it shouldn’t, but just in case) beat in another spoonful or two of powdered sugar. Ice and decorate the cupcakes. With this frosting, a little goes a long way.

Wednesday, February 15, 2012

Chocolate Mousse with Raspberry Coulis

It's no secret that Valentine's Day is a commercially-motivated beast. Corporate sponsors revel in increased sales of roses, chocolates, greeting cards, and stuffed whoziwhatsits, while restaurant folk grudgingly welcome the increased traffic and accompanying profit. Some people seem to embrace this holiday with open (and flower-filled) arms, while most others have a variety of other reactions.


From being moderately unenthused ("Why do I have to designate one day to show people I love them? Shouldn't that be every day?") to the utterly, albeit entertainingly, cynical ("F*** Valentine's Day."), there is no one consensus about the holiday.

To be honest, I can't even reconcile my own thoughts on the day to form one coherent and consistent opinion. Do I think it's a fabricated holiday? Absolutely. Do I like the idea of showing all the important people in your life some much needed love? Of course I do. Do I want to mock the holiday while simultaneously being spoiled with treats and sweet words and romantic gestures? You know it.

(I blame years of watching romantic comedies for that last one. Some of us never got past the fact that those are not real life situations.)

I was lucky this year to have a Valentine's Day that pretty much took the cake of perfection. Friends and family sent cards, making me feel all warm and fuzzy. And then BF #1 (that's because he is #1, not because he is one of several...) hit it out of the park with a workday delivery of chocolate-covered strawberries (yes, my love can be bought with food. Don't act like it wouldn't work for you, too.) and a homemade dinner that was so delectable that I continue to drool over it today.

You want to see it? OK - here is the masterful chef and his handiwork:
Grill pan - best invention ever for city-dwellers.
I need a photographer friend. Because this picture does not do the lamb chops, asparagus, and spinach-feta rice pilaf justice.
Of course, my contribution to the meal was dessert. Coveted dessert. Mousse is a perfect Valentine's Day treat because it's decadent, full of chocolate, and doesn't leave you feeling SO full that you lose your Valentine's spirit (you culprits know who you are, peanut-butter cheesecake...). Adding the raspberry coulis brings a tartness to offset the sweetness of the mousse.

Happy day/week/month/year of love!

The computer has outsmarted me and won't let me rotate my photo. I suppose I need a computer programmer friend in addition to a photographer!
Chocolate Mousse with Raspberry Coulis

Mousse:
6-8 ounces bittersweet chocolate, finely chopped
1/3 cup whole milk
1 large egg yolk
4 large egg whites
2 tablespoons sugar

Coulis:
1 pint raspberries, washed
1/4 cup sugar
1/4 cup water

Directions:
Melt the chocolate in a double broiler or microwave oven. (If you want to melt the chocolate in the microwave, set it to 30 seconds and stir thoroughly, then every 15 seconds thereafter, until melted.) Keep the chocolate in a bowl large enough to hold all of the ingredients. Let cool slightly, but the chocolate should still feel warm to the touch when you're ready to use it.

Bring the milk to a boil, then pour it over the chocolate. Using a small whisk, gently blend the milk into the chocolate. Add the egg yolk and gently whisk it into the chocolate, stopping once the yolk is incorporated.

In a stand mixer, beat the egg whites on medium speed just until they hold soft peaks. Increase the speed to medium-high and gradually add the sugar. Continue to beat the whites until they are firm but still glossy. Scoop 1/3 of the whites out of the bowl onto the chocolate mixture. Working with a whisk, beat the whites into the chocolate to lighten the mixture. Then, with either the whisk or a large flexible rubber spatula, delicately but thoroughly fold the rest of the beaten whites into the chocolate.

Turn the mousse into a large serving bowl or into individual cups, and refrigerate for 1 hour to set. This can keep for up to three days (though the texture will become more dense).

While the mousse is setting, prepare the coulis. In a small sauce pan, bring the raspberries, sugar, and water to a boil. Allow to boil for about 5 minutes, or until the raspberries have broken down. Turn off the heat and puree the mixture.

Once the coulis has cooled off, drizzle (or, if you're like me and LOVE raspberry, pour) the puree over the set mousse. Decorate to your hearts content, and then enjoy your treat!

Sunday, February 12, 2012

Dark Chocolate-Cherry Ganache Bars

In true "Gal-entine's Day" spirit (and because shipping soup ranks up there with bungee jumping on a piece of fishing line in terms of good ideas), my friends Amy and Lakshmi and I are doing a sweet treat exchange.

Not only are these girls wonderful friends, but they also happen to be quite the baking connoisseurs. Translation: Toll House chocolate chip cookies wouldn't quite cut it. (Disclaimer: I love THCCC's). As always, Melissa Clark at the NYTimes came to my rescue.

The butteriness of the shortbread crust complements the fudginess of the ganache, and the pop of the cherry adds a very welcome final note. The original recipe called for kirsch or another liqueur to be included in the ganache; given that one of the two recipients is 19 weeks into an approximate 40 week-long period of sobriety (and a lack of soft cheeses, deli meets, and tobacco), I opted to withhold that ingredient.

These tasted delicious in the kitchen. Ladies, you will have to let me know if they arrive at your respective homes in one piece.

That cherry goodness is just oozing out!
Valentine's Math: Shortbread + Ganache = Love
Dark Chocolate-Cherry Ganache Bars
Adapted from New York Times
Time: 1 hour, plus chilling time

Ingredients:
1.5 cups all-purpose flour
3/4 cup confectioners’ sugar
1/4 cup unsweetened cocoa powder
1/2 teaspoon fine sea salt
12 tablespoons cold unsalted butter
1 teaspoon vanilla extract
3 healthy tablespoons cherry jam
12 ounces bittersweet chocolate, at least 62 percent
2/3 cup heavy cream

Optional:
3 tablespoons kirsch, rum, brandy or other spirit
1/2 teaspoon fleur de sel, for sprinkling.

Directions:
1. In a food processor, pulse together the flour, sugar, cocoa powder and fine sea salt. Pulse in the butter and vanilla until the mixture just comes together into a smooth mass. Line an 8-inch square baking pan with parchment or wax paper. Press the dough into the pan. Prick all over with a fork. Chill for at least 20 minutes and up to 3 days.

2. Heat the oven to 325 degrees. Bake the shortbread until firm to the touch and just beginning to pull away from the sides, 35 to 40 minutes.

3. Cool in the pan for 20 minutes on a wire rack. Brush jam over shortbread’s surface and let cool thoroughly.

4. Place chocolate in a heatproof bowl.

In a saucepan, bring the cream to a simmer. Pour over the chocolate and whisk until smooth. Whisk in the kirsch. Spread over shortbread. Sprinkle fleur de sel on. Cool to room temperature; cover and chill until firm. Slice and serve.


Friday, February 3, 2012

Mini Chocolate-Oreo Cheesecakes with Gingersnap Crust

Can you believe it's already February? Nope, me neither. The first month of this year has flown by with some type of vengeance. Mind you, this is likely due to day after day of fun-filled adventures. Atlantic City for a bachelorette party? Don't mind if I do. North Carolina for a relaxing weekend at the lake? Sure, I'd love to. Hiking in the glowing sun on a January Sunday? Yes, please, and thank you.

This weekend is a local one, but it's shaping up to be a goodie. Dinner at friends' tonight, going to the UNC-Maryland basketball game tomorrow (Go Heels!), family brunch Sunday, and then Superbowl to round things out. Phew, I'm tired just thinking about it! Best part of all is that half of these events involve cooking. And far be it from me to make recipes that are tried and true. No ma'am, we are letting the experiments fly this weekend. First up: desserts for this evening.

I love the idea of these miniature cheesecakes for two reasons: portion control (yeah, I laughed just typing  that) and transportability. Like any cheesecake, the recipe can be modified to include any ingredient your heart desires. These little suckers are rich, so their small size makes them the perfect after-dinner treat.

Yes, you found Waldo. There IS a bite (or three) missing from this one. Sue me.

Mini Chocolate-Oreo Cheesecakes with Gingersnap Crust
Recipe inspired by Baking Bites
(Makes 17-18)

Crust:
2 cup gingersnap cookie crumbs
3 tbsp brown sugar
small pinch salt
4 tbsp butter, melted

Cheesecake:
12 oz cream cheese, softened
3 tbsp sour cream
1/2 cup sugar
1.5 large egg (or 2 small eggs)
2 tsp vanilla extract
6 oreos, crushed
2 cups semi-sweet chocolate chips, melted

Preheat oven to 350F. Line muffin pan with paper liners.
In a medium bowl, make the gingersnap cookie crust. Mix together gingersnap crumbs, brown sugar, and salt. Pour over melted butter and stir with a fork to moisten the crumbs. Place about a tablespoon of crumb mixture in each of the prepared muffin cups and pack down into an even layer.

In a large bowl, make the cheesecake. Cream together cream cheese, sour cream and sugar until smooth. Beat in the egg and vanilla extract. Stir in oreo bits.
In a double broiler (or microwave), heat chocolate chips until just melted, stirring often. Mix melted chocolate into cheesecake batter. If you prefer a marbled look, just swirl the chocolate in without mixing vigorously.
Divide cheesecake mixture evenly into prepared muffin tins.
Bake for 20-25 minutes, until cheesecakes are set.
Allow to cool for 10 minutes in the muffin pan, then carefully transfer cheesecakes to a cooling rack to cool completely before refrigerating.

Serve with whipped cream!

Thursday, December 22, 2011

S'more Cookies

Hello, old friends. It has been far too long since I have posted any goodies. It could be because I was on a mission to Mars. Or curing cancer. Or completing an Ironman. Or maybe it's just because I've been out and about in the excitement and busy-ness that is DC living. Regardless of the reason, it's time to share a new sweet treat.

This recipe seemed like the perfect thing to bring to a "Southern BBQ" themed office holiday party. They were fun to make and ultimately turned out very well. With modification.

Here's the thing-the graham crackers on these were just all wrong. They made the cookies seem dry and a little bit like cardboard. BUT, after painstakingly removing every graham cracker from every cookie, there was quite the transformation. The cookies were chewy and flavorful, packing a perfectly balanced cinnamon punch to accompany the sweetness of the chocolate and marshmallows. The flavor of the graham cracker remained, without the overwhelming texture it made originally.

Interesting variations would be to crumble graham crackers into the dough or to substitute graham cracker crumbs for some of the flour. If you try it, let me know!


S'more Cookes
Adapted from Eat, Run, Read


Ingredients:
9 tablespoons unsalted butter, softened
1 cup brown sugar, packed
½ cup granulated sugar
2 large eggs
1 teaspoon vanilla
1 teaspoon baking soda
½ teaspoon salt
1 teaspoon cinnamon
2 ½ cups flour
1/2 cup semi-sweet chocolate chips
1 cup mini marshmallows
3 regular sized Hershey’s bars, broken into pieces
1-2 packages graham crackers, broken into square **See note in text**

Directions:
Cream together the butter and both sugars. Add the eggs and vanilla.
Gradually mix in the dry ingredients: flour, baking soda,  salt and cinnamon.
Fold in the chocolate chips and marshmallows. Chill dough in refrigerator for 1 hour.
Preheat the oven to 375 degrees. Line baking pans with parchment paper or tin foil. I used one 11x17 pan and one 9x13 pan but you can really use any sized pans you want.
Lay out graham crackers side by side on the pans as close as possible (they should be touching). For thicker cookies, use less graham crackers and more dough.
Place rounded tablespoons of dough on graham crackers about 1 – 1 ½ inches apart. Use your fingertips to slightly press down.
Bake for 5 minutes then remove from oven to press Hershey’s bar pieces on to the top.
Bake for an additional 6-8 more minutes or until dough is beginning to turn golden brown at the edges. The foil should make it easy to lift the cookies out of the pan and break them apart.

Monday, September 26, 2011

Pumpkin Cupcakes with Maple-Cream Cheese Frosting...in a jar!

This past Friday was Sister's birthday. Not just any birthday, mind you. Her very last birthday that begins with a "2." As the younger sister, I waste no opportunity to remind Sister that she is aging before I am! And since I am enjoying being back in closer proximity to the family, I had to take the opportunity to do my gloating in person.

As September shifts from summer to fall, so did our meal. Mama B and I whipped up a summery dinner of cajun-spiced red snapper tacos accompanied with balsamic-roasted squash and zucchini. Dessert, however,  ushered us right into fall with pumpkin spice cupcakes. And since I needed dessert to be easily transportable, this baking project turned into a craft project, as well!

Cupcake jars are adorable, making an easy and attractive gift when you're low on creativity. Alternate layering cupcakes with frosting inside of an 8oz. jelly jar, wrap them up with a sweet ribbon, add a pretty label, and ta-da! So cute, it's ridiculous.

Can you believe I forgot to take a picture of the finished jars?? Fail.
Pumpkin Cupcakes With Maple–Cream Cheese Frosting
Recipe from Smitten Kitchen

1 stick unsalted butter, room temperature
1 cup firmly packed dark-brown sugar
1/3 cup granulated sugar
2 cups cake flour
2 teaspoons baking powder
1 teaspoon baking soda
1 teaspoon ground cinnamon
1 teaspoon ground ginger
1/2 teaspoon ground nutmeg
1/8 teaspoon ground cloves
1/2 teaspoon salt
1/4 teaspoon freshly ground black pepper
2 large eggs
1/2 cup buttermilk mixed with 1 teaspoon vanilla
1 1/4 cups canned solid-pack pumpkin

Frosting
Two (8-ounce) packages cream cheese, softened
1 stick unsalted butter, room temperature
2 cups confectioners’ sugar
1/4 cup pure maple syrup

Cupcakes:1. Preheat the oven to 350° (175°C). Do NOT line the cupcake pan!
2. In a stand mixer, beat the butter and sugars on medium speed until fluffy, about 5 minutes. Meanwhile, sift the flour, baking powder, baking soda, cinnamon, ginger, nutmeg, cloves, salt, and pepper into a medium bowl.
3. Add the eggs 1 at a time to the mixer, scraping down the sides after each addition. Alternate adding the flour and milk mixtures, beginning and ending with the flour. Beat in the pumpkin until smooth. Scoop the batter among the cupcake liners — about 3/4 full. Rap the filled pans once on the counter to release any air bubbles. Bake the cakes until a toothpick inserted into the center comes out clean, about 20 to 25 minutes. Cool the cupcakes on racks completely.

Frosting:In a stand mixer beat all the ingredients on medium until fluffy. Spoon frosting into a ziploc baggie and cut off the tip of the bag to make a makeshift frosting piper. This will make the addition of the frosting to the jars infinitely easier. Trust me on this one.

Sunday, July 3, 2011

Strawberry Upside-Down Cake with Cardamom

Have you ever celebrated Midsommar, the Swedish summer solstice festival? Me neither. Until this year, that is.  

Turns out that Midsommar is a pagan tradition that involves pickled herring, potatoes, beer, and strawberry desserts. Since I happen to think that Joy the Baker is a genius, her recipe for a strawberry cake that involved cardamom seemed to be just the ticket.

Go make this, and make it now. Maybe make two. And hide one from everyone else. And keep your windows shut, while you’re at it, because it tastes (and smells) that good!

Fun side note for the single ladies: Midsommar tradition says that unmarried women should pick seven types of flowers before bedtime, and then jump over seven fences. Put the flowers under your pillow, and POOF, you will dream of your future hubby. Brad Pitt, here I come.


Happy July 4th, friends!


Strawberry Upside-down Cake
Recipe from Joy the Baker

Topping:
2 tablespoons unsalted butter
1/4 cup brown sugar
1 cup sliced strawberries

Cake:
1/2 cup unsalted butter, softened
2/3 cup brown sugar
1 large egg
1 teaspoon pure vanilla extract
1 1/3 cups all-purpose flour
1 teaspoon baking powder
1/4 teaspoon baking soda
1/4 teaspoon salt
1/4 teaspoon ground cardamom
2/3 cup sour cream

Directions:
Preheat oven to 350 degrees F.

I used a 10-inch cast-iron skillet. Joy says you can also use an 8-inch cake pan with 3-inch tall sides, or a 9-inch cake pan with 2-inch sides.

Place butter in the pan and place in the oven.  When butter is melted, remove pan from the oven.  Using two pot holders, tilt the pan around and around, coating the sides of the pan with butter. Once sides are coated, set aside.

In a medium bowl, whisk together flour, baking powder, baking soda, salt, and cardamom.  Set aside.

In the bowl of an electric stand mixer, fitted with a paddle attachment, cream butter and brown sugar on medium speed.  Cream until slightly pale and fluffy, about 3 minutes.  Stop mixer, scrape down the bowl with a spatula, and add egg and vanilla extract.  Beat for 1 minute.

Turn the mixer off, scrape the bowl, and add the dry ingredients.  Beat on low speed while adding the sour cream. Beat until the batter just comes together.  Batter will be pretty thick.  Remove the bowl from the mixer and finish incorporating ingredients with a spatula.

Sprinkle 1/4 cup brown sugar into the melted butter in the cake pan.  Sprinkle strawberry slices over the butter and sugar in a single layer.  Spoon batter over the strawberries and spread evenly with a spatula.  Bake for about 30-35 minutes, or until a skewer inserted in the center comes out clean.

Let cake rest for 10 minutes before running a knife around the edge of the cake and inverting the cake onto a cake plate.  Serve warm with sweetened sour or whipped cream.

Homemade Whipped Cream
½ pint heavy whipping cream
⅓ cup sugar
splash of vanilla
pinch of salt

Add ingredients to a large mixing bowl. With a beater or whisk, whip mixture until it stiffens and forms peaks. And if you don’t have an electric beater or mixer, fear not. My own were packed, and a cheapie wire whisk worked just fine (spin the handle between your palms for fast whisking with minimal effort). Enjoy!

Monday, June 27, 2011

Ruffled Lemon Cake

I think I need a partner. A kitchen partner. You know, one of those creative types. Because, man oh man, I am not skilled in the “make it look pretty” department.

Let me introduce you to my newest victim: the ruffled lemon cake.

I have been itching to make this cake for weeks, wanting to save it for a special occasion. Mainly because I hear eating a whole cake by yourself makes people look at you funny. Anywho. If dear Angela’s baby shower wasn’t the perfect occasion to make a frilly, pastel-colored treat, I don’t know what would be.

Each individual component (cake, filling, icing) came out great, and they tasted oh-so yummy in my tummy. To the point where, after a day of biking many miles to and from the wineries in Woodinville, I opted to eat frosting for dinner instead of a real meal. It’s calcium, right?

At this point, I was feeling good. Like this cake might actually be impressive. And then, I started to decorate.
The ruffle tip was not working well for me, the frosting was too warm and didn’t hold shape, and the filling kept oozing out the sides. I finally gave up on ruffling the sides, learned to cool the frosting, and tried to salvage our little friend.

The result was a lopsided, heap of a dessert that surprised you with a delicious tang and its smart little wit. Recipe is a keeper, but I’ll be accepting applications for a decorator! 

Just for laughs, here is what the cake was supposed to look like verses what it actually looked like. Can you tell which is which?


Ruffled Lemon Cake
Recipe from Kitchen Magpie

Cake
Ingredients:
1/2 cup of butter
1 1/2 cups of white sugar
3 eggs
1 tsp vanilla
2 cups of cake flour
2 tsp baking powder
1/2 tsp salt
3/4 cup of milk
4 tbsp lemon zest
1/4 cup of lemon juice

Directions:

  1. Preheat the oven to 350 degrees. 
  2. Grease and flour two 9 inch round cake pans. 
  3. Beat together your butter and sugar…then add in your eggs and vanilla. 
  4. Whisk together your dry ingredients… 
  5. Grate your lemon zest. 
  6. Then beat the lemon zest into the butter/sugar mixture. 
  7. Squeeze the lemon out until you get 1/4 of a cup. 
  8. Fill the remainder of the measuring cup to an entire cup. 
  9. Combine the butter/sugar mix with the milk/lemon thoroughly, mixing it on medium speed to get it as airy as possible. 
  10. Slowly mix in your flour, by hand, very gently. You don’t want to over-mix the batter. Lift it and fold it over gently, trying not to lose the air you whipped into it the last step. 
  11. When it’s just combined, pour into the two prepared cake pans, evenly dividing the batter. 
  12. Bake at 350 degrees for 25-30 minutes, until the middle springs back when touched or a knife inserted comes out clean. 
  13. While the cakes are cooling ,whip up some Lemon Cake Filling
  14. When the filling and cakes are cooled, layer together. 
  15. Whip up some Lemon Buttercream Icing. Grab a Wilton icing tip #103 and fill an icing bag full of the icing. Now, you want to start icing the cake holding the small part of the tip towards the top angled up. Keep on creating ruffles around the cake, throwing the buttercream into the freezer for quick cooling bursts if you sense it’s not holding it’s shape due to the warmth of your hands.
Lemon Cake Filling
Ingredients:

2 tbsp grated lemon zest
2/3 cup of freshly squeezed lemon juice
1 1/2 tbsp cornstarch
1/2 cup of butter
3/4 cup of white sugar
5 egg yolks

Directions:

  1. Whisk the cornstarch into the lemon juice completely while it’s cold (thus no lumps) and add in the grated lemon zest as well. 
  2. Put the butter and sugar in now as well and heat on a medium burner.Bring to a boil, stirring constantly and let boil for a minute. Remove from the heat. 
  3. Take the egg yolks and whisk them until they are light yellow. 
  4. You now need to temper the eggs, which means you take some of the hot liquid from the pot and whisk it into the egg yolks completely. 
  5. Then you can whisk the yolks into the pot of hot liquid safely, without lumps forming. 
  6. Cool for an hour or so until it’s set and thick, ready to be used between cake layers.
Lemon Buttercream Icing
Ingredients

1 cup of salted butter
4 cups of icing sugar
2 tablespoons lemon zest
3 tablespoons lemon juice
2 teaspoons milk

Directions:
  1. Whip your butter with the paddle attachment if you have one, or just a general beater with your mixer. 
  2. Add in your icing sugar, one cup at a time, beating continously. Now 2 tablespoons lemon zest worked wonderfully for me. Zested peel should not be done on a regular grater, by the way, you need a smaller size, a zester grater, in fact. The size is perfect without being overwhelming chunks in your cooking. 
  3. The 3 tablespoons of lemon juice was just perfect for my tastes, zingy and zippy with a sweet background of pure sugar and butter. I then added the 2 teaspoons of cream to thin it out.

    Friday, May 6, 2011

    Childhood in a cookie

    I would like to thank my friend, Jessica, for having a birthday this week. And America for turning Cinco de Mayo into a holiday. And for any other excuse to get together with friends and celebrate.

    OK fine, you’re right. We don’t ever need an excuse, do we?

    Jessica has a sailboat and invited us to come celebrate her birthday on this lovely vessel. It was a hysterical outing, and thanks to the 12 layers of long underwear and wool we had donned, warm and intimate. She should have birthdays more often.

    What better way to celebrate a birthday than to reconnect with your inner child?  That’s where this dessert comes in. Peanut butter and jelly is a foundational part of every child’s growing experience. Thank goodness I wasn’t born allergic to peanuts (my condolences to those less fortunate).

    Let me tell you, I was disappointed with these bars when they first came out of the oven.  I thought they were dry and bland. Rather than throwing them out, I tossed them in the freezer overnight. Next day, they had transformed! Moist, and flavorful, it was like eating an entirely different cookie!  Warning--these guys are rich. I suggest cutting them pretty small.
    Peanut Butter and Jelly Bars
    Adapted from Food Network - Ina Garten
    1/2 pound (2 sticks) unsalted butter, at room temperature
    1 1/2 cups sugar
    1 teaspoon pure vanilla extract
    2 extra-large eggs, at room temperature
    2 cups (18 ounces) creamy peanut butter
    1.5 cups all-purpose flour
    1.5 cups whole wheat flour
    1 teaspoon baking powder
    1 1/2 teaspoons kosher salt
    1 1/2 cups (18 ounces) raspberry jam or other jam
    2/3 cups salted peanuts, coarsely chopped

    Directions
    Preheat the oven to 350 degrees F.
    Grease a 9 by 13 by 2-inch cake pan. Line it with parchment paper, then grease and flour the pan.
    In the bowl of an electric mixer fitted with the paddle attachment, cream the butter and sugar on medium speed until light yellow, about 2 minutes. With the mixer on low speed, add the vanilla, eggs, and peanut butter and mix until all ingredients are combined.
    In a small bowl, sift together the flour, baking powder, and salt. With the mixer on low speed, slowly add the flour mixture to the peanut butter mixture. Mix just until combined.
    Spread 2/3 of the dough into the prepared cake pan and spread over the bottom with a knife or offset spatula. Spread the jam evenly over the dough. Drop small globs of the remaining dough evenly over the jam. Don't worry if all the jam isn't covered; it will spread in the oven. Sprinkle with chopped peanuts and bake for 45 minutes, until golden brown. Cool and cut into squares.

    Monday, April 25, 2011

    Spring Holidays


    What an eventful past few weeks it has been! I’ve visited four states, seen lots of old friends, celebrated anniversaries, weddings, birthdays, and had myself a grand old time. But all of this high-living has kept me away from the kitchen! So when Easter and Passover coincided this year, it seemed like a ripe opportunity to get back to it. And get back to it, I did!

    First up: Easter cheesecake
    Next on the docket: Passover Charoset, a roasted carrot salad, and an orange-almond cake with ginger that will knock your pretty little striped socks off.

    Also, some exciting news. I have decided to take a fellowship in Washington, DC! 

    Easiest Cheesecake You’ll Ever Make
    Crust
    1 1/2 cups finely ground graham cracker crumbs
    1/3 cup white sugar
    6 tablespoons butter, melted
    1/2 teaspoon ground cinnamon (optional)

    Directions
    1. Mix graham cracker crumbs, sugar, melted butter or margarine, and cinnamon until well blended . Press mixture into an 8 or 9 inch pie plate.
    2. Bake at 350F for 8 minutes. Cool.

    Filling
    Ingredients:
    2 (8 ounce) containers low fat cream cheese, softened
    2 eggs, beaten
    3/4 cup white sugar
    1 tablespoon vanilla extract
    1 graham cracker pie crust

    Directions
    1. Preheat oven to 350F.
    2. In a large bowl, beat together the cream cheese and sugar until smooth. Mix in the eggs and vanilla extract until lightly and creamy; pour into the prepared crust.
    3. Bake in preheated oven for 25 minutes, or until the center jiggles evenly when the cake is shaken lightly. Refrigerate 1 hour before serving.

    Tuesday, March 15, 2011

    Avocado and Black Bean...what?

    If you thought nothing in this world could be more frustrating than an unripe avocado, try having TWO of those stubborn guys. Like insolent little children, they just sat on the counter in their little green jackets, hard as could be. Normally, I might be a little more patient, willing to coax them along. But I am heading out of town in 24 hours, so it came down to the wire.

    Enter: creative uses for avocado.  I’ve used avocado in a quick bread before, but when I saw this recipe, the promise of fudgy, chocolatey goodness (without butter or oil!) won me over. I am a girl, after all.

    The word on the reviews, which I am echoing, is that these brownies taste worlds better once they have had a chance to sit and cool, ideally overnight.  Naturally, for the sake of scientific integrity, I had to do taste tests along the way. Right after they came out of the oven, I was underwhelmed. After they’ve chilled all evening, delicious! I’ll have to report back on the “day after” taste test tomorrow.

    Temporary verdict: they don't satisfy the same cravings as the most decadent of brownies, but for a heart-healthy way to get your chocolate fix, these are pretty damn good.

    Now, it’s time for me to get my little ducks in a row for my impending “lovefest trip”. First stop is in Maryland to celebrate my grandparents’ 70th wedding anniversary. That’s a long time, isn’t it?! After that, I’m going to hop, skip, and jump down to North Carolina for my friends’ wedding. The cup runneth over.
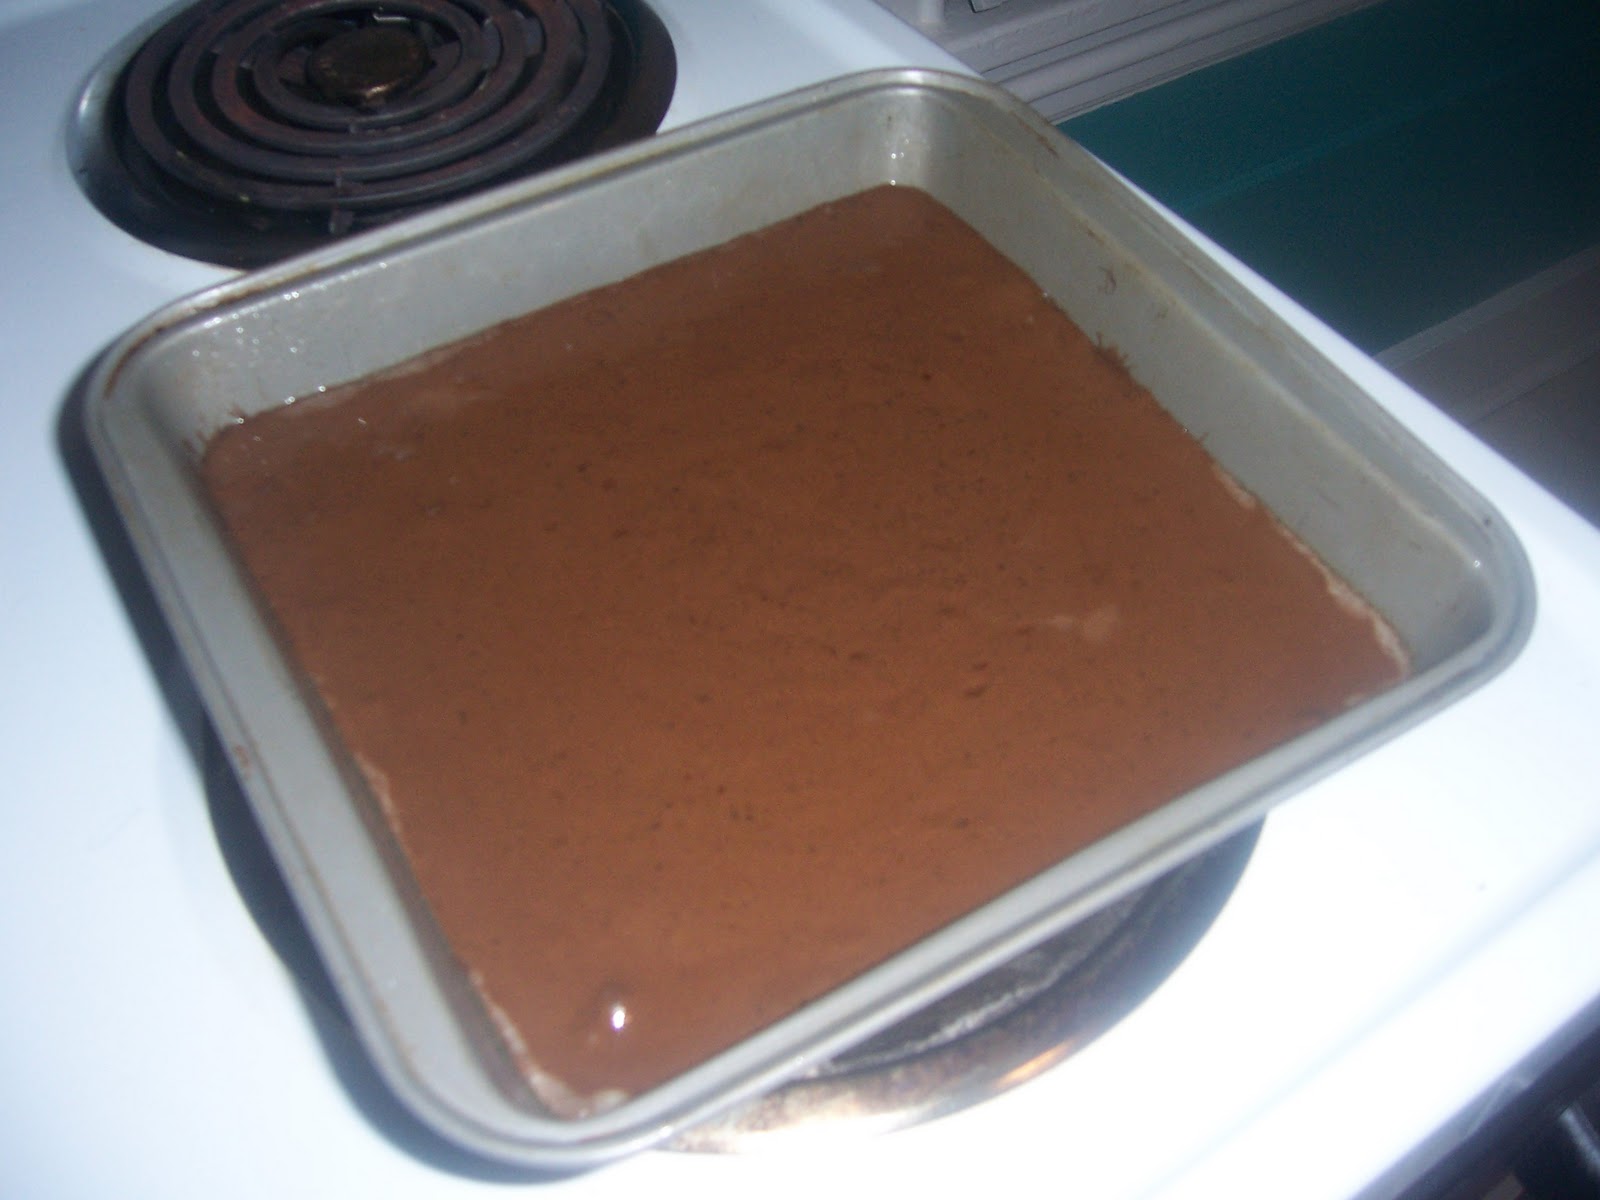
    No mixing!

    Starting to look like brownies

    Brownie success!  Now if only I could learn to operate a camera....


    Black Bean & Avocado Brownies
    Adapted from Cara’s Cravings

    Ingredients:
    1 can black beans, rinsed and drained
    3 eggs
    1/4 cup maple syrup
    1/2 ripe avocado
    6 tbsp cocoa powder
    pinch of salt
    1 heaping tsp vanilla
    6 tbsp white sugar
    2 tsp instant coffee

    Directions
    Preheat oven to 350.
    Grease an 8×8 pan.
    Combine the beans, egg, syrup and avocado in the food processor.  Blend until completely smooth.  Add the remaining ingredients and continue to blend until fully combined, scraping once or twice.  Spread batter into pan and bake 30 minutes or until toothpick inserted comes out clean. Allow to cool completely, preferably overnight.  Cut and serve.