Wednesday, April 27, 2011

Stuffed

Sometimes you feel like a nut, sometimes you don’t.  Sometimes you feel incredibly motivated to cook up beautiful feasts, sometimes you don’t.

With inspiration and time running low, but still seeking a homecooked meal, stuffed peppers are hard to beat. I made this version with odds and ends that have been patiently been sitting in my fridge/cupboard waiting to be used, but you can easily mix and match to make all sorts of combinations. Quinoa, spinach, and olive oil are a nice combination. Bulgur, feta, and sundried tomatoes are another. My general formula is: peppers + grain + seasoning + vegetable = yum.


Orzo-Stuffed Peppers
¾ cup orzo
3 cups chicken broth
2 cloves garlic, minced
1 cup marinara sauce
1 cup broccoli cooked florets, chopped
½ cup grated parmesan cheese
1 tbsp oregano
1 tsp red pepper flakes
2 bell peppers

Directions
1. Preheat oven to 400F.
2. Boil chicken broth and add orzo, cooking ~5 minutes or until orzo is not quite done.
3. While orzo is cooking, remove the stems and seeds from the bell peppers. It is sometimes helpful to cut a very thin layer off of the bottom of the peppers in order to help them stay standing as they cook.
3. Drain orzo, pouring leftover broth into an 8x8 square baking pan.
4. Mix orzo with the rest of the ingredients, and spoon into the hollowed bell peppers (depending on the size of your peppers, you might need a third pepper).
5. Place stuffed peppers onto baking pan, cover with foil, and cook about 45 minutes or until peppers are tender.

Monday, April 25, 2011

Passover Feast

Growing up, Passover was one of those holidays that seemed like an ancient form of torture to a child. The smells of delicious food would hover in the room as you were forced to sit through a lengthy seder in which food played a very minimal role.  

Needless to say, as an adult, my friends and I took the full liberty of foregoing the traditional ceremony in favor of eating first and celebrating by way of enjoying some fantastic company.  I can’t even tell you how much food we had. Or ate. Oy.  I’m still full this morning! Since all of the recipes were so delicious, I couldn’t pick which to share...so you get them all!

Also, a quick note-
Charoset is a traditional apple and nut dish that is used in the Passover ceremony as a symbol of the mortar that the Israelites used to hold bricks together while they were enslaved in Egypt. It plays a fairly prominent role in the Seder. But really, it’s just delicious and worth eating any time of year. Liberally.

Ashkenazic-Style Charoset

3 medium Gala or Fuji apples, peeled, cored, and finely diced (food processor works great)
1 1/2 cups walnut halves, lightly toasted, cooled, and coarsely chopped
1/2 cup sweet red wine
1 1/2 teaspoons ground cinnamon
1 tablespoon packed brown sugar

Directions
In large bowl, stir together all ingredients. Store, covered, at room temperature until ready to serve.

Moroccan Roasted Carrot Salad with Chard and Parsley
From A Passover Dinner Gets a Mediterranean Makeover

3 pounds carrots, peeled and cut into 3-inch chunks
1 teaspoon cumin
1/2 teaspoon paprika
Salt
1/2 cup olive oil (divided)
2 bunches Swiss chard, stems removed, leaves roughly chopped
1 bunch Italian (flat-leaf) parsley, washed and roughly chopped
Zest and juice of 1 lemon
1 clove garlic, pressed or finely minced
1 teaspoon honey
Freshly ground black pepper

Directions
Preheat the oven to 400 degrees. Arrange the carrots on a rimmed baking sheet and sprinkle with cumin, paprika, a generous pinch of salt and 1/4 cup of the olive oil (add more if necessary to coat the carrots well). Toss to coat. Roast, stirring occasionally, until the carrots are soft and caramelizing on the edges (about 30 minutes). Remove from the oven and place the carrots on a serving dish.

While the carrots are roasting, bring a large pot of water to a boil and salt generously. Place a large bowl of ice water in the sink. Add the chard to the boiling water and cook until tender but still bright green, about 3 to 5 minutes. Use a slotted spoon to transfer the chard to the ice water to stop the cooking (this step is optional, but locks in the bright green color).

Drain the chard and pile it on top of the carrots. Top with the parsley. In a small bowl, whisk together the remaining 1/4 cup olive oil, lemon zest and juice, garlic and honey. Season dressing to taste with salt and pepper. Pour over the salad, toss to coat, and let sit at room temperature for a few hours to allow flavors to integrate before serving.

Flourless Orange-Almond Cake with Ginger
From A Passover Dinner Gets a Mediterranean Makeover

2 large oranges (or 3 smallish oranges)
2 cups almond meal
1/4 cup candied ginger, minced
1 cup granulated sugar, plus 2 tablespoons (divided)
6 large eggs
1 cup heavy cream
Dash vanilla extract (optional)
1 cup orange marmalade

Directions
Place the oranges in a pot, and cover with water by a few inches (the oranges will bob around, but that's OK). Simmer until the oranges are totally soft, about 1 hour, turning them occasionally so that all sides are simmered (this will not smell as lovely as you'd think it would). Drain, and let cool.

While the oranges are cooling, preheat the oven to 350 degrees. Grease a 9-inch springform pan.

Chop the boiled oranges into large pieces, discarding any seeds. Place the oranges, skin and all, into a food processor, and process until the oranges are finely minced. Add the almond meal, candied ginger and 1/2 cup of the sugar; process until combined.

In the bowl of a stand mixer fitted with the whisk attachment, beat the eggs and 1/2 cup of the sugar on high speed until light and thick enough to form a ribbon when the mixture falls from the beater (this can take up to 10 minutes). Gently fold in the orange mixture until just combined. Pour into the prepared pan, smooth the top, and bake until a tester comes out clean and the top springs back when lightly touched, about 1 hour. Transfer to a wire rack to cool completely before removing the ring.

Before serving, whip the cream, vanilla and remaining 2 tablespoons sugar to medium-soft peaks. Spread the cream over the top of the cake. Stir the marmalade to loosen it up, then spread it over the cream.

Spring Holidays


What an eventful past few weeks it has been! I’ve visited four states, seen lots of old friends, celebrated anniversaries, weddings, birthdays, and had myself a grand old time. But all of this high-living has kept me away from the kitchen! So when Easter and Passover coincided this year, it seemed like a ripe opportunity to get back to it. And get back to it, I did!

First up: Easter cheesecake
Next on the docket: Passover Charoset, a roasted carrot salad, and an orange-almond cake with ginger that will knock your pretty little striped socks off.

Also, some exciting news. I have decided to take a fellowship in Washington, DC! 

Easiest Cheesecake You’ll Ever Make
Crust
1 1/2 cups finely ground graham cracker crumbs
1/3 cup white sugar
6 tablespoons butter, melted
1/2 teaspoon ground cinnamon (optional)

Directions
1. Mix graham cracker crumbs, sugar, melted butter or margarine, and cinnamon until well blended . Press mixture into an 8 or 9 inch pie plate.
2. Bake at 350F for 8 minutes. Cool.

Filling
Ingredients:
2 (8 ounce) containers low fat cream cheese, softened
2 eggs, beaten
3/4 cup white sugar
1 tablespoon vanilla extract
1 graham cracker pie crust

Directions
1. Preheat oven to 350F.
2. In a large bowl, beat together the cream cheese and sugar until smooth. Mix in the eggs and vanilla extract until lightly and creamy; pour into the prepared crust.
3. Bake in preheated oven for 25 minutes, or until the center jiggles evenly when the cake is shaken lightly. Refrigerate 1 hour before serving.

Sunday, April 3, 2011

Battling with collards

Collards, let's talk. You're healthy. You lower cholesterol, prevent cancer, and fill me up with loads of vitamins. You're even cheap, to boot.  I *really* want to like you. But you're bitter. Oh, so bitter. Maybe you didn't get hugged enough as a child.

I've tried them a million ways, grudgingly choking them down each time, but I think I might have found a keeper with this recipe. The acidity of the tomatoes and the flavor from the spicing helps mask the bitterness of the collards. Only taking about 30 minutes to make, this can easily be thrown into the weekday rotation of 'easy to whip up when you're feeling whipped' meals.

Collards with lentils, tomatoes, and Indian spices
Adapted from Whole Foods, Serves 4

Ingredients
1 medium onion, chopped
4 cloves garlic, thinly sliced
1 heaping tablespoon garam masala
1 (15-ounce) can no-salt-added diced tomatoes
1 bunch collard greens, thick stems removed and leaves sliced into 1-inch-thick ribbons
1 cup lentils

Directions
Bring 1/2 cup water to a simmer in a large deep skillet over medium-high heat. Add onion and garlic and cook 5 minutes or until onion is translucent. Stir in garam masala and cook 1 minute. Add tomatoes and their juices with 1 cup water and bring to a boil. Reduce heat to medium-low and stir in collards. Cover and simmer 20 minutes.

Meanwhile, combine lentils and 2 cups water in a medium pot. Bring to a boil. Reduce heat to a simmer and cook about 20 minutes or until lentils are tender (green lentils will take longer than red). Stir lentils into skillet with collards and serve.

Monday, March 28, 2011

Easy Weeknight Dinner

What a week this past week has been! Last weekend was the celebration of my grandparents' 70th wedding anniversary. Yup, you read that right. 70 years. Crazy, isn't it? When my grandmother told her hairdresser the occasion for the party, her hairdresser replied, "Where did you go for your honeymoon? Summer camp?!"

I spent a few days in Baltimore, soaking up the time with family members and friends I haven't seen in years. It was wonderful and did my soul good. As if things could get any better, the following weekend was the wedding of my friends Summer and Steve. Since I was already on the east coast, it was all too convenient to scoot down to North Carolina for some more celebrating.

The wedding was beautiful, and there's just something about being with old friends that makes any activity more fun. Dancing, chatting, and a little wine time added on to the soul food that Baltimore had already fed it. It was not an easy thing to leave those ladies!

The trip back took a few hours longer than expected thanks to a broken airplane door. Since those things are sort of important, I was ok with switching out the planes. But it meant an arrival time of 2am PDT, leaving me a little lacking in the energy department today.

The original recipe for this soup calls for all fresh ingredients, but since my refrigerator is a little lonely right night, I filled in with frozen veggies. It's simple to put together and would do well with several other combinations of greens, vegetables, and grains. The unique spice combo (my friend, Amy, knows that I can't miss a chance to throw in some cumin) plays up the spice factor and tempers well with the coconut milk. I'll definitely be making many more versions of this soup!
Step 1
Step 2

Ta da!
Curried Coconut and Chickpea Soup
Adapted from Epicurious


1 tablespoon canola oil
1.5 tsp red pepper flakes
1 medium onion, chopped
1.5 cup mixed frozen veggies
2 cloves of garlic, minced or pressed
½ teaspoon ground cumin
½ teaspoon curry powder
½ teaspoon ground coriander
¼ teaspoon garam masala
2 cups low sodium vegetable broth
1 cup of diced tomatoes, with juice
1.5 cups of cooked chickpeas
freshly ground pepper
1 can light coconut milk
1 cup cooked barley (or other cooked grain of your choice)
1 cup peas

Heat the canola oil in a large, heavy-bottomed pot. Add the pepper flakes, onions, and bell peppers and sauté over medium high until they begin to soften, about five minutes. Add the cumin, turmeric, coriander, and garam masala, along with the garlic, and sauté another minute, stirring very often.

Stir in the broth, tomatoes, chickpeas, salt, and pepper to taste. Bring to a boil, then reduce the heat and simmer gently, partially covered, for about thirty minutes, stirring occasionally.

Add the coconut milk and barley. Simmer for ten more minutes, then increase the heat to medium and add the peas. After all of the ingredients have been incorporated, salt the soup to taste and serve hot. Serves four.

Tuesday, March 15, 2011

Avocado and Black Bean...what?

If you thought nothing in this world could be more frustrating than an unripe avocado, try having TWO of those stubborn guys. Like insolent little children, they just sat on the counter in their little green jackets, hard as could be. Normally, I might be a little more patient, willing to coax them along. But I am heading out of town in 24 hours, so it came down to the wire.

Enter: creative uses for avocado.  I’ve used avocado in a quick bread before, but when I saw this recipe, the promise of fudgy, chocolatey goodness (without butter or oil!) won me over. I am a girl, after all.

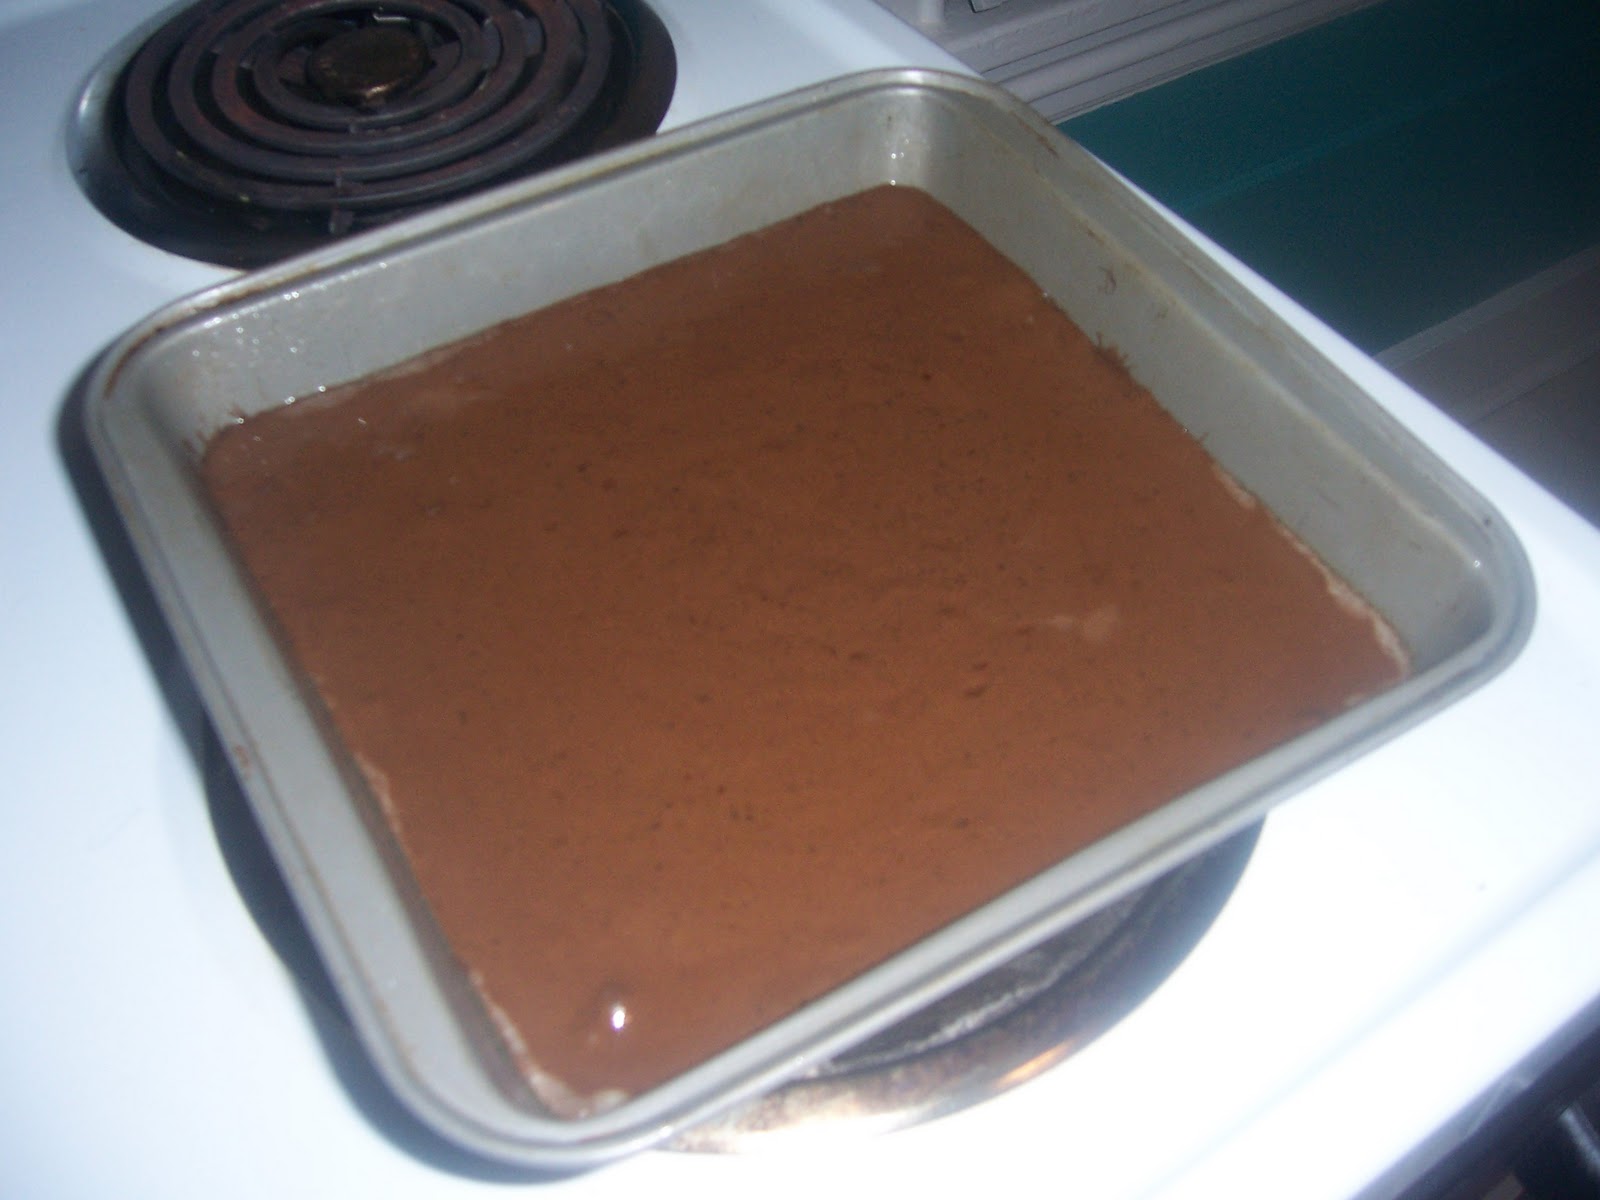
The word on the reviews, which I am echoing, is that these brownies taste worlds better once they have had a chance to sit and cool, ideally overnight.  Naturally, for the sake of scientific integrity, I had to do taste tests along the way. Right after they came out of the oven, I was underwhelmed. After they’ve chilled all evening, delicious! I’ll have to report back on the “day after” taste test tomorrow.

Temporary verdict: they don't satisfy the same cravings as the most decadent of brownies, but for a heart-healthy way to get your chocolate fix, these are pretty damn good.

Now, it’s time for me to get my little ducks in a row for my impending “lovefest trip”. First stop is in Maryland to celebrate my grandparents’ 70th wedding anniversary. That’s a long time, isn’t it?! After that, I’m going to hop, skip, and jump down to North Carolina for my friends’ wedding. The cup runneth over.
No mixing!

Starting to look like brownies

Brownie success!  Now if only I could learn to operate a camera....


Black Bean & Avocado Brownies
Adapted from Cara’s Cravings

Ingredients:
1 can black beans, rinsed and drained
3 eggs
1/4 cup maple syrup
1/2 ripe avocado
6 tbsp cocoa powder
pinch of salt
1 heaping tsp vanilla
6 tbsp white sugar
2 tsp instant coffee

Directions
Preheat oven to 350.
Grease an 8×8 pan.
Combine the beans, egg, syrup and avocado in the food processor.  Blend until completely smooth.  Add the remaining ingredients and continue to blend until fully combined, scraping once or twice.  Spread batter into pan and bake 30 minutes or until toothpick inserted comes out clean. Allow to cool completely, preferably overnight.  Cut and serve.

Sunday, March 13, 2011

Zesty and Tangy

Moving full steam ahead with baking, the next item on the agenda was a “healthy” dessert to bring to a get-together with the girls in my program. Well, I decided to forego healthy and follow my heart to a tart, satisfying, treat: lemon bars.

Here’s the thing. This is not your average lemon bar. Nooo.  These lemon bars have some sass. Some pizazz. You’ve got personality? So do they.

This is largely due to the use of the WHOLE lemon in this recipe. Yes, you read correctly. Break out your food processor, because you’re using the whole enchilada. But just between you and me, it works. I mean, it really works.

These lemon bars are not for the faint-hearted. The tang in these guys will make your eyes bulge. And then you’ll go back for seconds. Maybe even thirds.

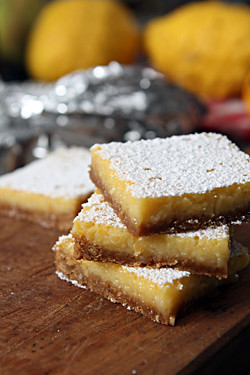
lemon bar recipe with gingersnap crust
Photo from David Leibovitz

Lemon Bars
David Leibovitz

Crust
1 cup all-purpose flour
¼ cup sugar
¼ teaspoon salt
8 tablespoons melted unsalted butter
½ teaspoon vanilla extract

Lemon Topping
1 lemon, organic
1 cup sugar
3 tablespoons freshly squeezed lemon juice
3 large eggs, room temperature
4 teaspoons corn starch
¼ teaspoon salt
3 tablespoons melted unsalted butter
Optional: powdered sugar, for serving

Directions

1. Preheat the oven to 350F.

2. Line an 8-inch square pan with parchment paper.

3. In a medium bowl, mix the flour, sugar, salt, melted butter, and vanilla, stirring just until smooth.

4. Smooth the batter into the bottom of the pan, using your hands or a small offset spatula to get it as level as possible.

5. Bake the crust for 25 minutes, or until it’s deep-golden brown.

6. While the crust is cooking, cut the lemon in half, remove the seeds, and cut the lemon into chunks.

7. Put the chunks of lemon in a food processor or blender along with the sugar and lemon juice, and let it run until the lemon is completely broken up. Add the eggs, corn starch, 1/4 teaspoon of salt, and 3 tablespoons melted butter, and blend until almost smooth. (A few tiny bits of lemon pieces are normal and encouraged.)

8. When the crust comes out of the oven, reduce the heat of the oven to 300ºF. Pour the lemon filling over the hot crust and bake for 25 minutes or just until the filling stops jiggling and is barely set.

9. Remove from the oven and let cool completely. Once cool, carefully lift out the bars grasping the foil. Cut the bars into squares or rectangles. Sift powdered sugar over the top just before serving, if desired.